
[商品] 使用【图1】【图2】的手持式手电筒产品图,参考【图4… - 图片创意预览

[商品] 使用【图1】【图2】的手持式手电筒产品图,参考【图4…

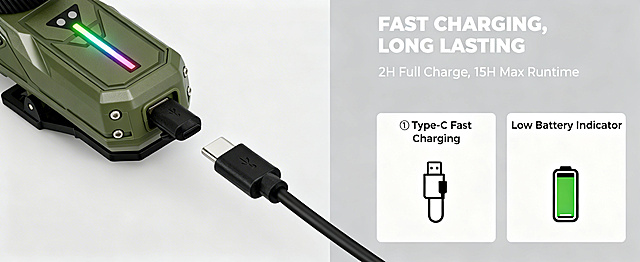
[商品] 使用【图1】【图2】的手持式手电筒产品图,参考【图4】的激光发射效果与手持构图;保留产品的钛灰色金属机身、顶部黑色端盖、正面圆形旋钮开关、HOT警示标识、各功能图标、侧面USB-C接口、底部

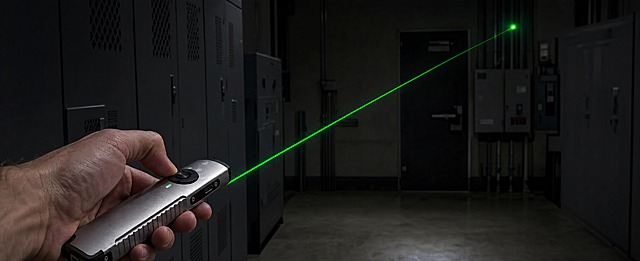
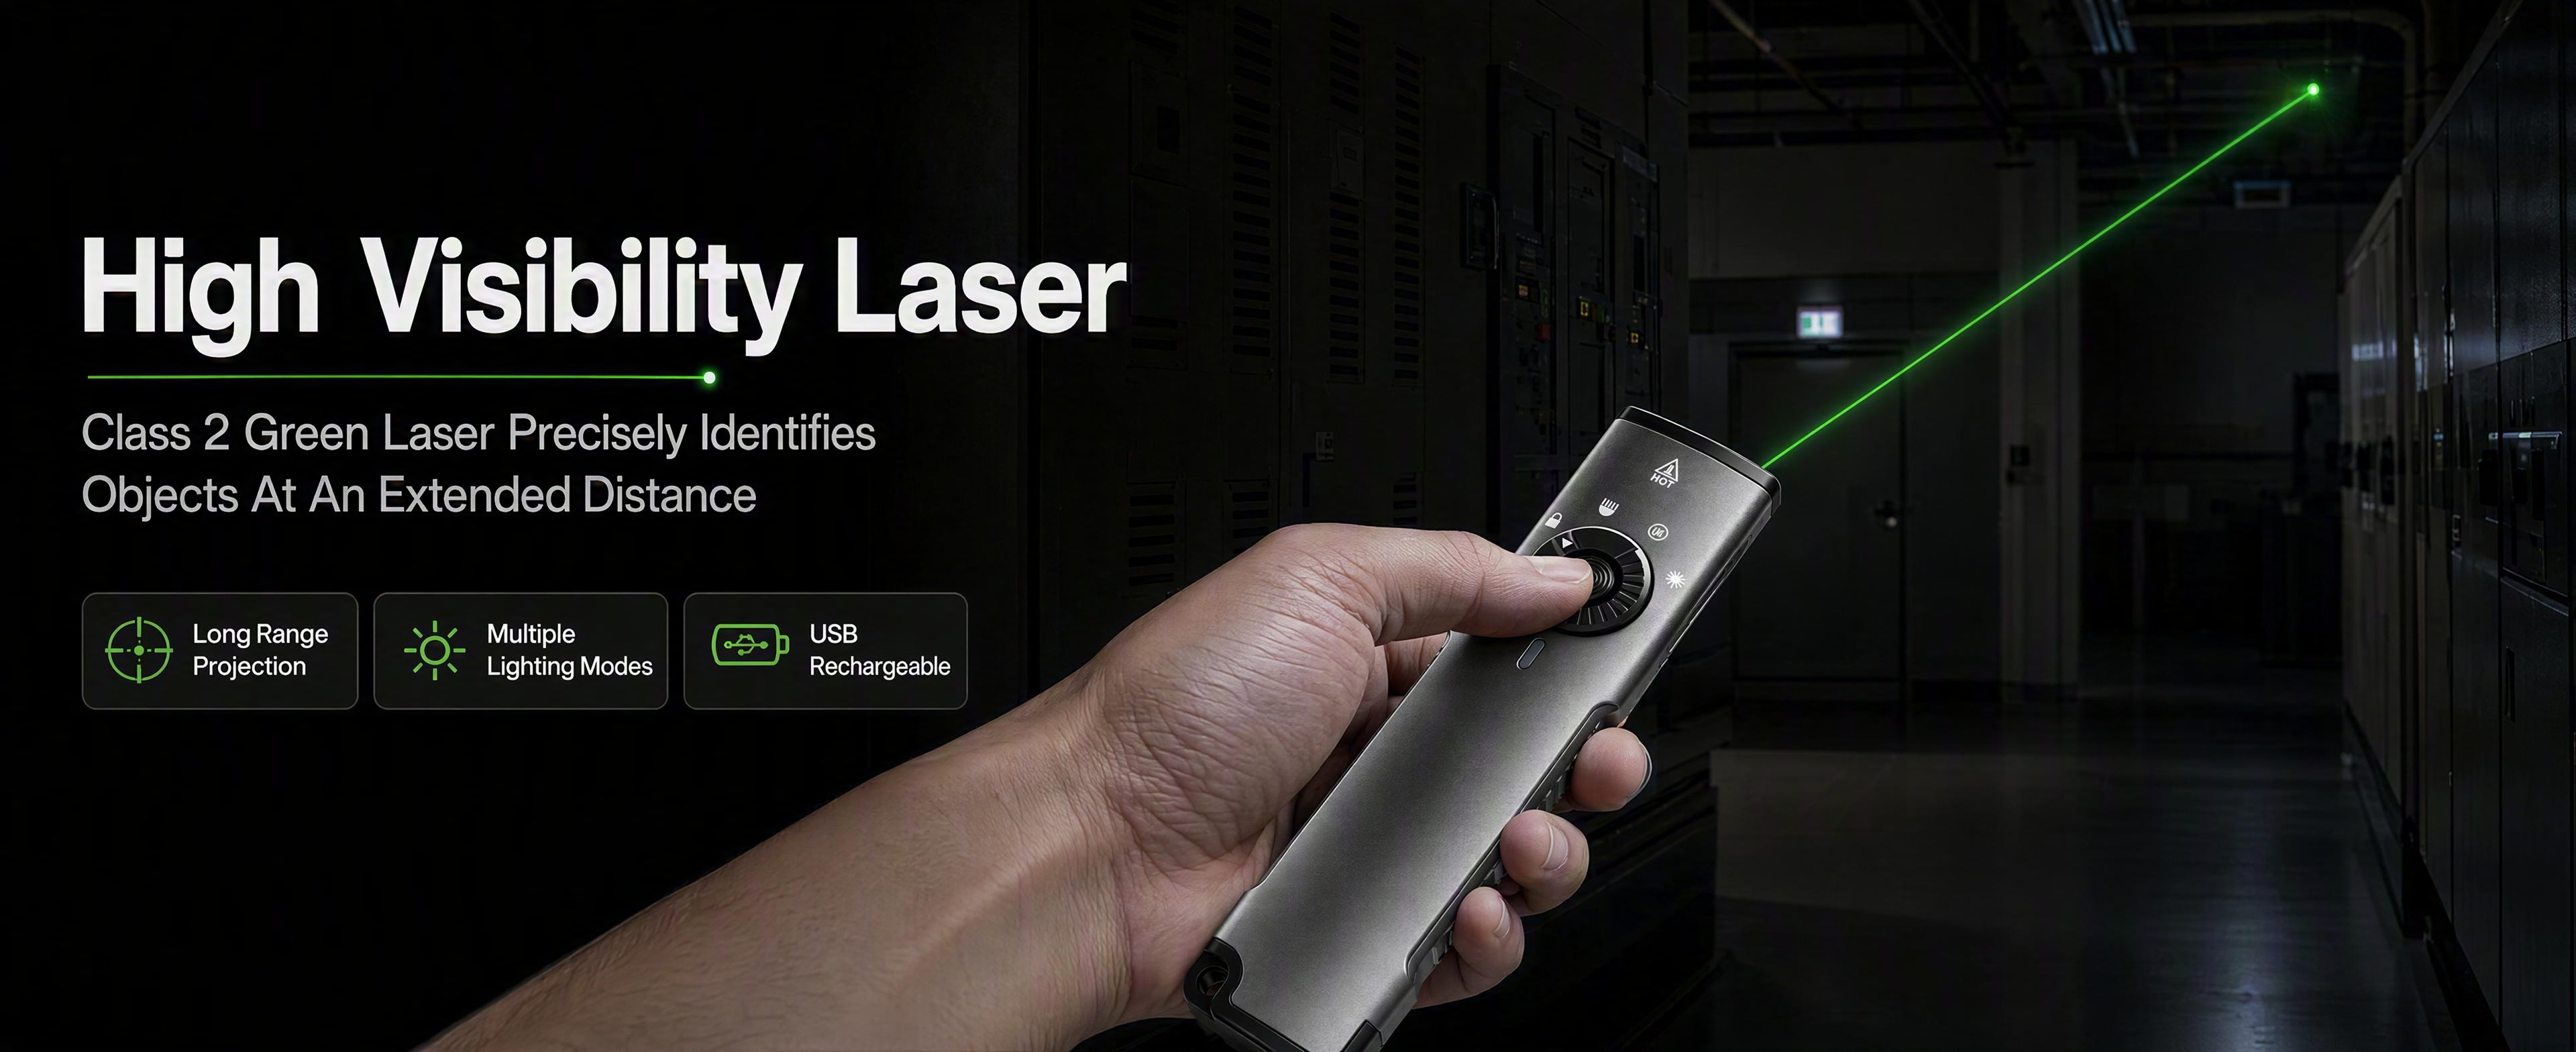
[商品] 使用【图1】手持式手电筒;保留银色金属机身、黑色包边、顶部出光口、侧面USB-C充电口、绿色指示灯、旋钮按键和底部Logo文字的结构、颜色、材质与比例;手电筒从顶部出光口向前发射绿色激光,功能方向真实自然。 [画面] 目标为展示手持手电筒发射绿色激光的真实使用场景,参考【图2】构图;欧美成人手部从画面左下角握持手电筒,手电筒朝向右上方,一道明亮清晰的绿色激光束从手电筒顶部出光口正前方中间位置射出,激光笔直延伸至远处;背景为昏暗的工业室内环境,有金属储物柜、电气设备等元素,环境偏暗以突出绿色激光的高可见度;画面无任何文字;产品与手部真实自然,激光效果真实不夸张。 [视觉] 套系策略:风格=跨境极简高级商业摄影;标题字=现代无衬线粗体;正文字=简洁无衬线体;主色=深炭灰黑;背景延展=基于深炭灰黑做深浅层级、工业金属质感与暗调环境;强调色=荧光绿,仅用于激光光束和小面积光效;标题色=白色;正文色=浅灰;组件=细线引线、圆角信息卡;光影=暗环境侧光,激光自发光为主光源,产品表面有真实金属反光。 [文字] 本张不出现任何文字。 [规格] 图片比例61:25横版,8K超清,真实自然,避免变形、模糊、文字出现、激光位置偏移、产品结构改变、颜色失真、亚洲手部、过曝。[商品] 使用【图1】手持式手电筒;保留银色金属机身、黑色包边、顶部出光口、侧面USB-C充电口、绿色指示灯、旋钮按键和底部Logo文字的结构、颜色、材质与比例;手电筒从顶部出光口向前发射绿色激光,功能方向真实自然。
[画面] 目标为展示手持手电筒发射绿色激光的真实使用场景,参考【图2】构图;欧美成人手部从画面左下角握持手电筒,手电筒朝向右上方,一道明亮清晰的绿色激光束从手电筒顶部出光口正前方中间位置射出,激光笔直延伸至远处;背景为昏暗的工业室内环境,有金属储物柜、电气设备等元素,环境偏暗以突出绿色激光的高可见度;画面无任何文字;产品与手部真实自然,激光效果真实不夸张。
[视觉] 套系策略:风格=跨境极简高级商业摄影;标题字=现代无衬线粗体;正文字=简洁无衬线体;主色=深炭灰黑;背景延展=基于深炭灰黑做深浅层级、工业金属质感与暗调环境;强调色=荧光绿,仅用于激光光束和小面积光效;标题色=白色;正文色=浅灰;组件=细线引线、圆角信息卡;光影=暗环境侧光,激光自发光为主光源,产品表面有真实金属反光。
[文字] 本张不出现任何文字。
[规格] 图片比例61:25横版,8K超清,真实自然,避免变形、模糊、文字出现、激光位置偏移、产品结构改变、颜色失真、亚洲手部、过曝。
[第1张] 亚马逊跨境详情页头图 - FIXIT Laser Level Pro 3 多功能激光水平尺产品主视觉海报。本张使用【图1】作为商品主体,保持产品黑色机身、三个绿色水平气泡、银色刻度标尺、FIXIT LASER LEVEL PRO 3 标识等外观结构完全一致。 [氛围/风格] 专业工业工具风,极简高端,商业摄影质感,真实客观,突出精密测量工具的专业感。 [元素布局] 产品水平放置在画面中下部,占比约60%,45度斜侧视角展示全貌;产品左端发射出一道醒目的红色激光水平线向左延伸,体现激光功能;背景为深灰到黑色的渐变,底部有微弱反光台面;左上角留出标题区,右下角点缀激光光点效果;产品物理结构、比例轮廓、按键位置、气泡颜色、刻度细节与输入图完全一致。 [光影质感] 左上方硬光照明,突出金属标尺的高光和黑色工程塑料的质感;产品下方有柔和自然投影,整体明暗对比强烈,工业感十足。 [配色色系] 全局底色 #1A1A1A 深灰黑渐变;主色黑色机身 + 银色金属;辅助色红色激光线 + 绿色水平泡点缀。 [视角构图] 45度微俯视,产品为视觉中心,阅读动线左上标题 → 中部产品 → 激光线延伸。 [文字版式] 全英文文案。左上标题区:主标题 "3-in-1 Laser Level",加粗无衬线字体,白色大字;副标题 "Tape Measure + Ruler + Laser Level All in One",浅灰色小字;下方信息条:"Precision Alignment for Every Project"。右下角小标签:"Laser Class II"。文字不遮挡产品主体,字体为工业风无衬线体。 [比例分辨率] 9:16 竖版比例,4K分辨率,文字清晰可辨,高清画质。 [负向提示词] 产品变形,缺件错件,结构错误,颜色偏差,中文字符,水印,文字错乱,文字过小,产品图模糊,背景杂乱,夸大宣传用语。[第1张] 亚马逊跨境详情页头图 - FIXIT Laser Level Pro 3 多功能激光水平尺产品主视觉海报。本张使用【图1】作为商品主体,保持产品黑色机身、三个绿色水平气泡、银色刻度标尺、FIXIT LASER LEVEL PRO 3 标识等外观结构完全一致。
[氛围/风格] 专业工业工具风,极简高端,商业摄影质感,真实客观,突出精密测量工具的专业感。
[元素布局] 产品水平放置在画面中下部,占比约60%,45度斜侧视角展示全貌;产品左端发射出一道醒目的红色激光水平线向左延伸,体现激光功能;背景为深灰到黑色的渐变,底部有微弱反光台面;左上角留出标题区,右下角点缀激光光点效果;产品物理结构、比例轮廓、按键位置、气泡颜色、刻度细节与输入图完全一致。
[光影质感] 左上方硬光照明,突出金属标尺的高光和黑色工程塑料的质感;产品下方有柔和自然投影,整体明暗对比强烈,工业感十足。
[配色色系] 全局底色 #1A1A1A 深灰黑渐变;主色黑色机身 + 银色金属;辅助色红色激光线 + 绿色水平泡点缀。
[视角构图] 45度微俯视,产品为视觉中心,阅读动线左上标题 → 中部产品 → 激光线延伸。
[文字版式] 全英文文案。左上标题区:主标题 "3-in-1 Laser Level",加粗无衬线字体,白色大字;副标题 "Tape Measure + Ruler + Laser Level All in One",浅灰色小字;下方信息条:"Precision Alignment for Every Project"。右下角小标签:"Laser Class II"。文字不遮挡产品主体,字体为工业风无衬线体。
[比例分辨率] 9:16 竖版比例,4K分辨率,文字清晰可辨,高清画质。
[负向提示词] 产品变形,缺件错件,结构错误,颜色偏差,中文字符,水印,文字错乱,文字过小,产品图模糊,背景杂乱,夸大宣传用语。
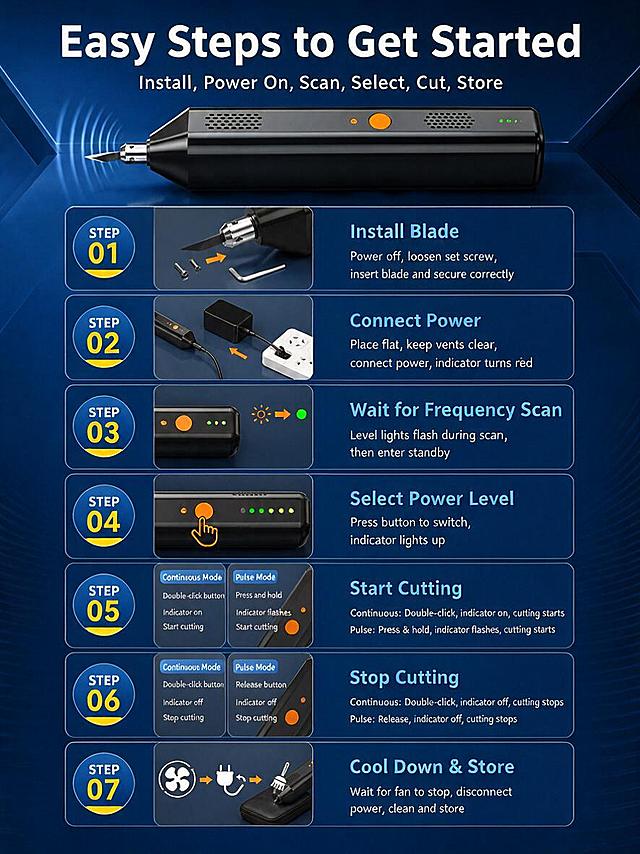
Strictly follow the layout, composition, product shape, all 7 step panels with illustrations, background style and color of the reference image. Only replace all Chinese text with English. Product and all step illustrations must remain exactly the same. Text replacements: - 使用步骤 简单易上手 → Easy Steps to Get Started - 安装 通电 扫频 选档 切割 收纳 → Install, Power On, Scan, Select, Cut, Store - 安装刀片 → Install Blade - 断电拧松顶紧螺丝 装入刀片并按方向要求固定 → Power off, loosen set screw, insert blade and secure correctly - 连接电源 → Connect Power - 放平主机 保持散热孔无遮挡 连接原装电源 电源指示灯亮红灯 → Place flat, keep vents clear, connect power, indicator turns red - 等待扫频 → Wait for Frequency Scan - 档位灯闪烁开始扫频 熄灭后进入待机状态 → Level lights flash during scan, then enter standby - 选择档位 → Select Power Level - 点按按键切换档位 对应档位指示灯亮 → Press button to switch, indicator lights up - 开始切割 → Start Cutting - 连续模式 双击按键 工作指示灯亮 开始切割 → Continuous: Double-click, indicator on, cutting starts - 点动模式 按住按键 工作指示灯闪烁 开始切割 → Pulse: Press & hold, indicator flashes, cutting starts - 连续模式 → Continuous Mode - 点动模式 → Pulse Mode - 双击按键 → Double-click button - 按住按键 → Press and hold - 工作指示灯亮 → Indicator on - 工作指示灯闪烁 → Indicator flashes - 开始切割 → Start cutting - 停止切割 → Stop Cutting - 连续模式 双击按键 工作指示灯熄灭 停止切割 → Continuous: Double-click, indicator off, cutting stops - 点动模式 松开按键 工作指示灯熄灭 停止切割 → Pulse: Release, indicator off, cutting stops - 松开按键 → Release button - 工作指示灯熄灭 → Indicator off - 停止切割 → Stop cutting - 冷却收纳 → Cool Down & Store - 停止后待风扇停止转动 再断电 清理收纳 → Wait for fan to stop, disconnect power, clean and store All text in English. Same font style, same colors, same positions. Product and all illustrations unchanged.Strictly follow the layout, composition, product shape, all 7 step panels with illustrations, background style and color of the reference image. Only replace all Chinese text with English. Product and all step illustrations must remain exactly the same.

Text replacements:
- 使用步骤 简单易上手 → Easy Steps to Get Started
- 安装 通电 扫频 选档 切割 收纳 → Install, Power On, Scan, Select, Cut, Store
- 安装刀片 → Install Blade
- 断电拧松顶紧螺丝 装入刀片并按方向要求固定 → Power off, loosen set screw, insert blade and secure correctly
- 连接电源 → Connect Power
- 放平主机 保持散热孔无遮挡 连接原装电源 电源指示灯亮红灯 → Place flat, keep vents clear, connect power, indicator turns red
- 等待扫频 → Wait for Frequency Scan
- 档位灯闪烁开始扫频 熄灭后进入待机状态 → Level lights flash during scan, then enter standby
- 选择档位 → Select Power Level
- 点按按键切换档位 对应档位指示灯亮 → Press button to switch, indicator lights up
- 开始切割 → Start Cutting
- 连续模式 双击按键 工作指示灯亮 开始切割 → Continuous: Double-click, indicator on, cutting starts
- 点动模式 按住按键 工作指示灯闪烁 开始切割 → Pulse: Press & hold, indicator flashes, cutting starts
- 连续模式 → Continuous Mode
- 点动模式 → Pulse Mode
- 双击按键 → Double-click button
- 按住按键 → Press and hold
- 工作指示灯亮 → Indicator on
- 工作指示灯闪烁 → Indicator flashes
- 开始切割 → Start cutting
- 停止切割 → Stop Cutting
- 连续模式 双击按键 工作指示灯熄灭 停止切割 → Continuous: Double-click, indicator off, cutting stops
- 点动模式 松开按键 工作指示灯熄灭 停止切割 → Pulse: Release, indicator off, cutting stops
- 松开按键 → Release button
- 工作指示灯熄灭 → Indicator off
- 停止切割 → Stop cutting
- 冷却收纳 → Cool Down & Store
- 停止后待风扇停止转动 再断电 清理收纳 → Wait for fan to stop, disconnect power, clean and store

All text in English. Same font style, same colors, same positions. Product and all illustrations unchanged.
Strictly follow the layout, composition, product shape, all 7 step panels with illustrations, background style and color of the reference image. Only replace all Chinese text with English. Product and all step illustrations must remain exactly the same. Text replacements: - 使用步骤 简单易上手 → Easy Steps to Get Started - 安装 通电 扫频 选档 切割 收纳 → Install, Power On, Scan, Select, Cut, Store - 安装刀片 → Install Blade - 断电拧松顶紧螺丝 装入刀片并按方向要求固定 → Power off, loosen set screw, insert blade and secure correctly - 连接电源 → Connect Power - 放平主机 保持散热孔无遮挡 连接原装电源 电源指示灯亮红灯 → Place flat, keep vents clear, connect power, indicator turns red - 等待扫频 → Wait for Frequency Scan - 档位灯闪烁开始扫频 熄灭后进入待机状态 → Level lights flash during scan, then enter standby - 选择档位 → Select Power Level - 点按按键切换档位 对应档位指示灯亮 → Press button to switch, indicator lights up - 开始切割 → Start Cutting - 连续模式 双击按键 工作指示灯亮 开始切割 → Continuous: Double-click, indicator on, cutting starts - 点动模式 按住按键 工作指示灯闪烁 开始切割 → Pulse: Press & hold, indicator flashes, cutting starts - 连续模式 → Continuous Mode - 点动模式 → Pulse Mode - 双击按键 → Double-click button - 按住按键 → Press and hold - 工作指示灯亮 → Indicator on - 工作指示灯闪烁 → Indicator flashes - 开始切割 → Start cutting - 停止切割 → Stop Cutting - 连续模式 双击按键 工作指示灯熄灭 停止切割 → Continuous: Double-click, indicator off, cutting stops - 点动模式 松开按键 工作指示灯熄灭 停止切割 → Pulse: Release, indicator off, cutting stops - 松开按键 → Release button - 工作指示灯熄灭 → Indicator off - 停止切割 → Stop cutting - 冷却收纳 → Cool Down & Store - 停止后待风扇停止转动 再断电 清理收纳 → Wait for fan to stop, disconnect power, clean and store All text in English. Same font style, same colors, same positions. Product and all illustrations unchanged.Strictly follow the layout, composition, product shape, all 7 step panels with illustrations, background style and color of the reference image. Only replace all Chinese text with English. Product and all step illustrations must remain exactly the same.

Text replacements:
- 使用步骤 简单易上手 → Easy Steps to Get Started
- 安装 通电 扫频 选档 切割 收纳 → Install, Power On, Scan, Select, Cut, Store
- 安装刀片 → Install Blade
- 断电拧松顶紧螺丝 装入刀片并按方向要求固定 → Power off, loosen set screw, insert blade and secure correctly
- 连接电源 → Connect Power
- 放平主机 保持散热孔无遮挡 连接原装电源 电源指示灯亮红灯 → Place flat, keep vents clear, connect power, indicator turns red
- 等待扫频 → Wait for Frequency Scan
- 档位灯闪烁开始扫频 熄灭后进入待机状态 → Level lights flash during scan, then enter standby
- 选择档位 → Select Power Level
- 点按按键切换档位 对应档位指示灯亮 → Press button to switch, indicator lights up
- 开始切割 → Start Cutting
- 连续模式 双击按键 工作指示灯亮 开始切割 → Continuous: Double-click, indicator on, cutting starts
- 点动模式 按住按键 工作指示灯闪烁 开始切割 → Pulse: Press & hold, indicator flashes, cutting starts
- 连续模式 → Continuous Mode
- 点动模式 → Pulse Mode
- 双击按键 → Double-click button
- 按住按键 → Press and hold
- 工作指示灯亮 → Indicator on
- 工作指示灯闪烁 → Indicator flashes
- 开始切割 → Start cutting
- 停止切割 → Stop Cutting
- 连续模式 双击按键 工作指示灯熄灭 停止切割 → Continuous: Double-click, indicator off, cutting stops
- 点动模式 松开按键 工作指示灯熄灭 停止切割 → Pulse: Release, indicator off, cutting stops
- 松开按键 → Release button
- 工作指示灯熄灭 → Indicator off
- 停止切割 → Stop cutting
- 冷却收纳 → Cool Down & Store
- 停止后待风扇停止转动 再断电 清理收纳 → Wait for fan to stop, disconnect power, clean and store

All text in English. Same font style, same colors, same positions. Product and all illustrations unchanged.